Content Sequence Block - Advanced
Display a time-based sequence of content such as important dates or milestones. Advanced Content Sequence blocks display horizontally on a page.
Note: you must enable the Content Sequence bundle to use this block.
Demo: Content Sequence
Create a Content Sequence
- Go to the Shortcuts toolbar and select Blocks.
- Click on Add Block at the top of the page.
- Select Content Sequence from the list of options.
Configure Advanced Content Sequence
- Label: a name used to uniquely identify the block.
- Title (optional): this displays above the Content Sequence block when placed on a page.
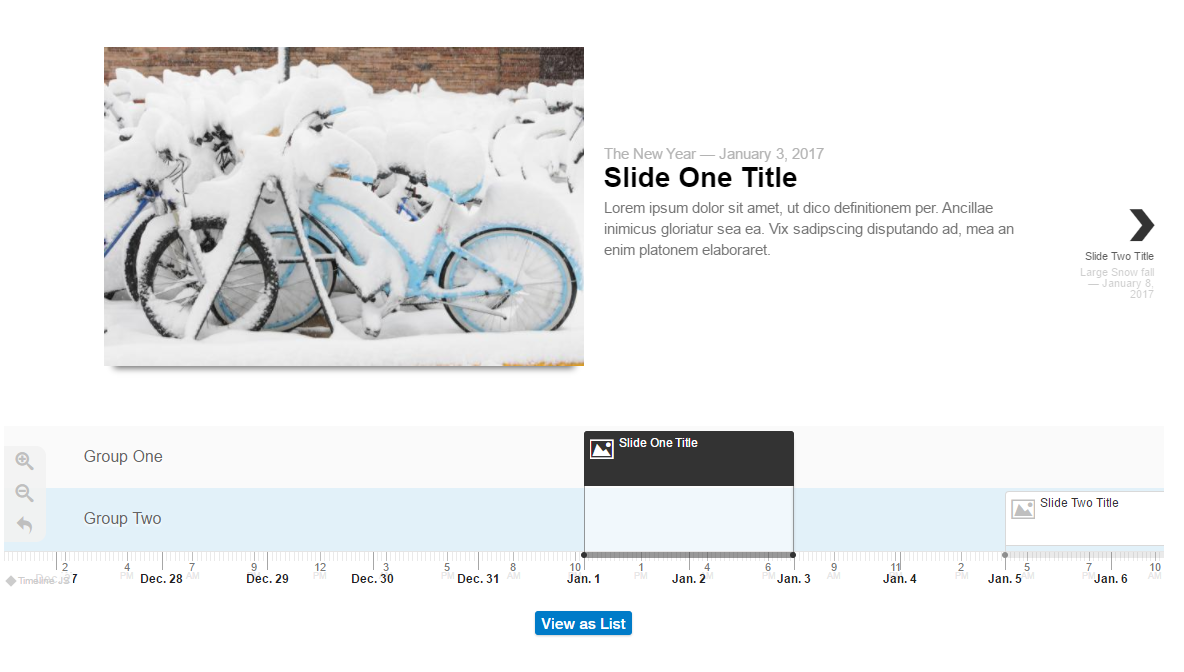
- Display: select Advanced Timeline from the Display drop-down.
- Advanced Settings: expand the Advanced Settings section and choose the timeline scale (.5, 1 or 2). A description is optional.
Add Sequence Content
Each content sequence section is called a Slide.
- Scroll down to the Sequence Content section.
- Title tab: enter the the Title (required) and Link (optional).
- Content tab: enter the body content (required). If the body content is left blank you will receive an error message when you save the block.
- Image: you may add an image. Upload the image and provide alternative text (files must be less than 256 MB. Allowed file types: png, gif, jpg, jpeg. Images must be smaller than 2000x2000 pixels.)
- Video: you may add a video to the slide. Enter the url of a Vimeo or YouTube video.
Note: Videos have priority. If you uploaded an image and already have a video URL, the video will display in the slide and not the image.
- Date tab: dates and times are required for advanced timelines. You can precisely position slides on the timeline with these fields.
- Start Date (required): enter the start date for your slide. Enter a time.
- Display Date (optional): enter unique text. If left blank, the Start date will display.
- End Date (optional): if you leave this field blank, the date will be just one day.
- Display End Date (optional): enter unique text. If left blank the End date will display.
- Group tab: this allows you to group slides and will display with one group timeline above the other group timeline. The first group used is displayed on top.
- Click Add another item to add more slides.
- Click Save.
Place Advanced Content Sequence
Content Sequence blocks work just like other blocks and can be placed in one of the various Content/Layout Regions on the site page.
Related: How to Place Blocks